The Singer Model 221 “Featherweight” Sewing Machine
I have been getting some email recently regarding Featherweights that continue to run without the foot pedal being depressed, so I thought I would add a “Troubleshooting Tip” on this topic. Back in days of black and white televisions, you may recall the picture having “snow” whenever the vacuum cleaner was running nearby, or when you were sewing on your Featherweight. To help alleviate this interference, Singer used some capacitors to help filter the “noise” generated from the electric motors on their sewing machines. Capacitors are silver colored can shaped devices and are shown in the photos below. Well, over time these capacitors can leak or otherwise fail, sometimes creating a “sneak path” for the electrical power and allowing the machine to run on its own. The solution is easy, and with today’s modern electronics, these noise suppression devices are no longer necessary.
Please be safe and make sure your machine is unplugged from any electrical source before doing ANY electrical inspection!
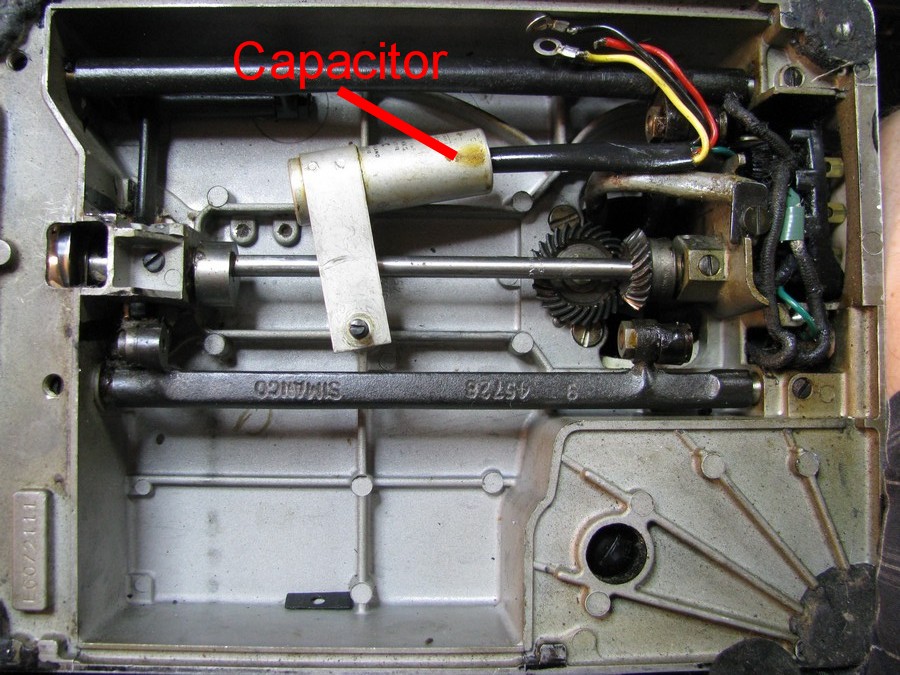
There are two THREE (I found another location) locations that Singer used for these noise suppression devices, either under the machine oil pan, or in the foot control, or within the motor windings. I have heard that they may be in both locations on the same machine, but I have not yet seen this. Regardless, the photo below shows the under-machine location, and this device was wired to the 3-pin connector (already disconnected). To remove you can either cut the wires at the back of the 3-pin connector, making sure that the remaining wire does not come in contact with the other wires or the machine body, or better yet, simply remove the screw holding the 3-pin connector and disconnect the wires from the 3-pin connector. Throw the capacitor away.
In the photos below you will see the foot control with the cover removed revealing 2 capacitors.
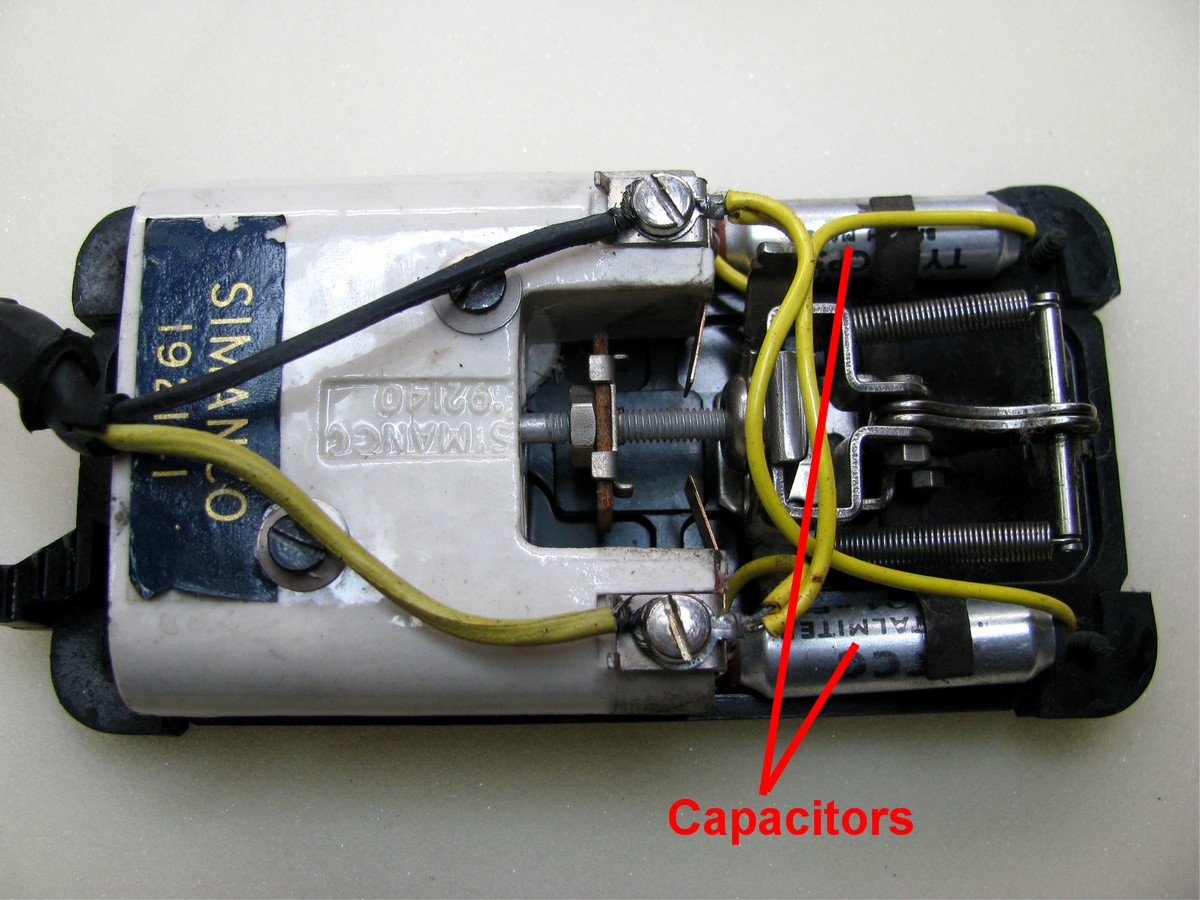

You can easily remove these devices without any issue. Simply remove the screws at each terminal and remove the wires that are attached to the capacitor, then reattach the main foot control wires. Pull the capacitors out of their brackets and discard.
The photo below shows the capacitors removed from the foot control.
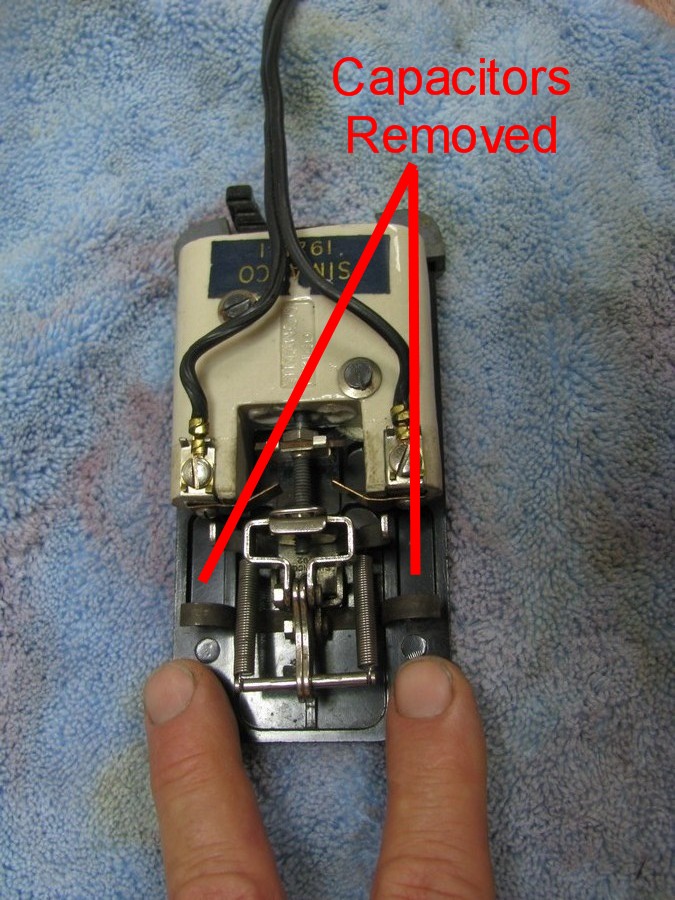
Your machine should now have the electrical sneak path removed and you should again have full control of your Featherweight!
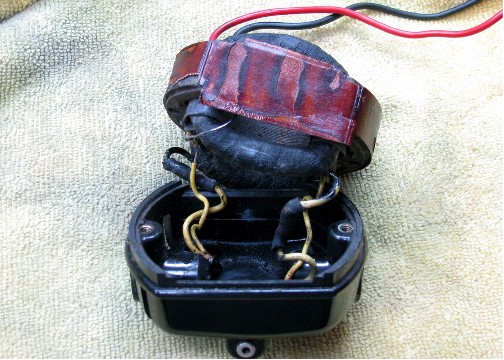
Recently, while servicing a Featherweight motor I noticed “extra” wires coming off the motor brush tubes. Upon closer examination, I discovered that the motor had noise suppression capacitors installed within the motor itself! This was my first time finding this on a Featherweight, so I thought I would add photos on this discussion.
I would not recommend removal of these capacitors by a novice. Better to take the motor to a qualified electrician for removal.
Extra circuits coming from brush tube connections.
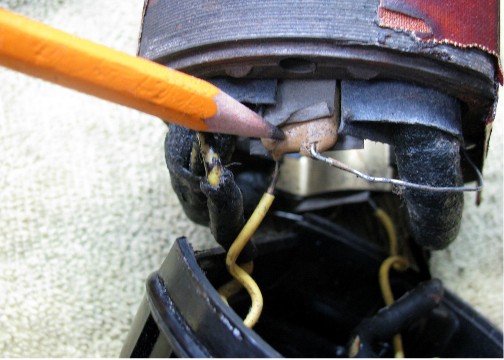
Showing capacitor between motor windings.
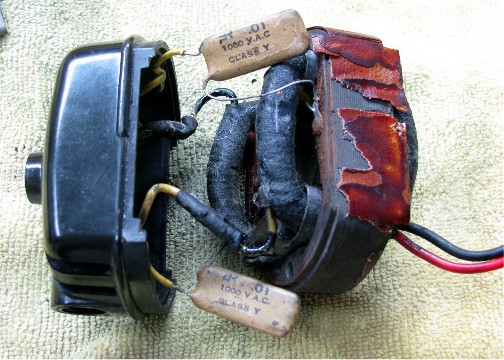
Capacitors exposed.
You can download a .pdf copy of these instructions here: Machine Runs On Its Own
Contact me at: Leo@TheFeatherweight221Factory.com
|